Cutting Down a Tree

Thursday, December 25, 2008 1 comments

I have had this project on my "To Do" list since we bought the house in August. It seems this maple tree had some damage from woodpeckers. The previous owner had it "trimmed back", and was told "it may grow back." Well, it never got any sprouts growing, and parts of it were beginning to look rotten and I wanted the space in the back yard .


So after Christmas Day brunch, my friend Jeff and I got a little restless. It was raining, so we figured a hike was out. Instead we ran by his dad's house and grabbed a chainsaw!


Then, back at my house, Jeff climbed the tree with the chainsaw and started cutting..........


The big chunks hit the ground with a thud and left a few divots. Fortunately none landed on any sprinkler lines.


Be sure to play the video of the tree falling! OK, not that exciting.....

We got it all cut down and into manageable sized pieces in just a couple of hours. And, as you can see, the rain stopped.

Read full post >>

The Neck

Tuesday, December 23, 2008 0 comments

I finally got started on the neck. I am using a 1 1/8" thick piece of mahogany. The plexiglass template is used to layout the neck pieces.

There is a bit of waste that I should use for blocking or something on other projects........... Smear a bit of Tightbond on and put it in the clamps. The pieces are cut a fair bit oversize, and the headstock is yet to be cut.


Next I will be routing the channel for the truss rod and beginning work on the fingerboard.

Read full post >>

Bound and Gagged

Sunday, December 14, 2008 0 comments

The binding on the edge of the guitar provides two functions. One is for protection of the instrument, the other is gluing surface. It helps to hold the corners of the guitar together.


I got the ledge routed out for the binding last week. I use a Dremel tool with an attachment that controls the depth of cut. At the cutaway the attachment is too big so that I cut by hand with a razor knife.


After the ledge is cut I fit the binding in place to be sure it fits properly. The ledge is trimmed with the razor knife if necessary. I then like to put a light coat of shellac on the instrument. The shellac provides a barrier that will keep the cyanoacrylate (super) glue from discoloring the bare spruce .


The Binding is put in place and held with tape. Thin CA glue is then wiked into the joint, and more tape put on to hold the binding tightly in place.


Tomorrow I will remove the tape.

Read full post >>

What am I thinking?

Tuesday, December 9, 2008 1 comments

So my brother sent me a link to a website, http://www.hundredpushups.com/. It is a program to get you to be able to complete 100 consecutive pushups. My brother has been competing (participating) in triathlons and such for the past few years. Not that he is in outstanding shape but doing well I guess. Well, I guess I felt I need to do something so I began the program today. The way the program works is to do an initial test, then based on your performance there are 5 sets of pushups a day, every other day. Based on my performance I started on week three with sets of (14-18-14-14-max). My arms are pretty sore.........

I have been doing hapkido for the last year and a half and feel healthy but would like to feel more fit. I hope to get back riding my mountain bike, we shall see how that goes. But I am going to finish out the pushup program for sure.

Read full post >>

Look Mummy, there's an airplane up in the sky

Sunday, December 7, 2008 1 comments

I was in the garage working on the archtop guitar today and heard a jet coming. I stepped out to the driveway and a B2 Bomber soon appeared. I ran in the house to get Reed to come have a look. We both thought it was pretty cool, and went back to what we were doing. A couple minutes later, it came back. I was able to grab the camera and get a few quick shots.

It ended up making 8 passes, with each pass coming right over our house.


Read full post >>

Topside

Saturday, December 6, 2008 0 comments


Nothing really new to look at, but I have the top glued to the sides. Pretty much looks like the gluing of the back, except it is not in the mold. Being glued to the back, the sides are rigid enough to keep their shape. It also saves me the hassel of getting it out of the mold.


Read full post >>

BACK in the saddle again

Sunday, November 30, 2008 1 comments

Today I attached the back to the sides. The blue tape along the sides is to protect from glue squeeze out. Prior to gluing, I marked the centerlines on the top and reference marks for easy placement with the glue. A bead of Tightbond around the rim, then position the back.


The clamping device I use is called a "go-bar deck". The poles are fiberglass sticks that flex and provide a constant pressure. The bars are easy to put in place, and easy to move around, if need be. It is MUCH easier this way than to use a bunch of clamps.


The go-bars remain out of the way, allowing easy checking for position. Also they do not push the pieces out of position.

The go-bar deck will be used again when I glue on the soundboard, in a similar fashon to here. It was also used when gluing the braces to the soundboard.

Read full post >>

FInished Linings

Saturday, November 29, 2008 0 comments

I finished up the linings today. Here are a couple pictures.

Read full post >>

Blocks and Linings

Friday, November 28, 2008 0 comments

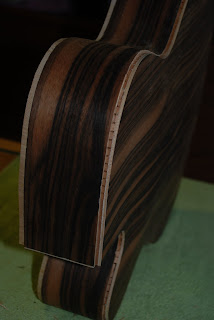
I previously mentioned that I am using a laminated back and side set. The sides come prebent to a fairly standard archtop shape, which fortunately is very close to the mold shape that I have. I fitted the rims to the mold and shaped up the neck and tailblocks and glued them in. For the picture I removed the glued pieces form the mold.

Then the linings and side braces are glued in. The linings provide a gluing surface to attach the top and back to the rims of the guitar.

The linings are made of a strip of wood (mahogany) that is cut every 1/4 inch. The "kerf" cuts allow the strip of wood to bend to follow the curves of the guitar. I also glued in the side braces, which are just small strips of mahogany every 4 inches.


I did not have enough clamps to finish all of the lining, so will do the other half tomorrow.


Read full post >>

A Project to Finish

Friday, November 21, 2008 0 comments

Back in February of 2007, I started building my second Archtop acoustic guitar. At the same time I was building a Martin OO size guitar for my son. Progress was going fine on both until a slip with a plane damaged the maple back on the archtop. I was glad that I had not spent a big wad of money on the maple (Home Depot), but the project got shelved. I did finish the guitar for my son, and gave it to him for Christmas 2007.


The soundboard is bearclaw Sitka Spruce from SE Alaska, with Bubinga back and sides, and Mahogany neck. Sprayed aerosol lacquer for the finish, and strung up with rope core strings.

Reed plays it once in a while and I enjoy playing it, and occasionally I use it at church on Sundays.

The Archtop, however, sat on the shelf until it was put on the moving truck to our new home. So I have been looking at it, and have decided that it needs to be completed. Here are a couple of pictures of the carving process to get the top where it is.

This is the wedges of spruce glued together ready to start carving.Then I use a planer in the drill press to cut kind of a topographic map to lay out the arch.Then use a small plane to do the actually carving of the top.


And sandpaper to make it smooth.


There is also the process of digging out the bowl on the inside. For this I use a depth gauge and drill a bunch of holes, then back tot he plane to remove the remainder of the material.


For the replacement back and sides I have decided to take a little detour. Rather than a carved back, I have ordered a laminated back and side set from ACME-Archtops. Although I would enjoy the process, it saves me from carving another back. There will be plenty of work to do, and I am sure other things will get in the way, but I am back to a project! And the beer was bottled on Tuesday.

Read full post >>

Secondary

Saturday, November 8, 2008 0 comments

Long ago, I used to home brew beer. I have been fortunate over the last several years to have a friend who owns a brewery, The Craftsman Brewing Co. of Pasadena, CA. I met Mark back in the summer of 1997 when I thought it would be fun to brew a batch. Mark provided some guidance, and many batch were brewed and drank in the kitchen and back porch of my friend Pat. Well after the Alaska trip of 2000 and the changes that brought to my life, brewing was put on the back burner. Then this past summer I decided to cook up a batch. Well my brewing equipment had long since disappeared, so I ordered some stuff from Northern Brewer. They have a great deal on shipping as long as you do not need the stuff "tomorrow". They also have a good selection of extract recipe kits. The equipment arrived, and I brewed up the "New Old Ale". Kind of a malty big beer, that I am still enjoying. The second kit I ordered was the "Nut Brown Ale". I finally got around to cooking it up last week. Today I transferred it to the secondary fermentor. I should be bottling it later this week, and ready to drink in early December.

Read full post >>

Stand

Wednesday, August 20, 2008 0 comments


So down at Bolsa Chica there is no place to set your board while you get ready, unless you set it on the sidewalk. Well one of the Harbour guys had a stand. I looked it over and a spare piece of plywood in my garage turned into one. I asked the guy what he would change on his, he said make it taller (his was only 24"). I made mine 30" tall, 20" wide and the stands are 30" apart. It is hinged to fold up flat for easy transport and storage at home.


This should be a nice height for waxing.


Yes, at Bolsa it would be like setting the board down on my driveway............

Read full post >>

A Grand Day Out

Saturday, July 26, 2008 0 comments

I made it out in the water again today!! I am still very pleased with the board. For a relative newbie to surfing, it is really a catch anything board. I have been able to get even the smallest of waves and take it for a ride.


Todays trip was to Seal Beach ( a change from my regular spot at Bolsa Chica.) I didn't get any pictures in the water, but one thing I like about Seal is the wash rack after you are done. Don't have to worry about the wall right by the showers at BC.


One issue I have had, is taking on a little water. I need to figure out where it is getting in. I think I am going to have to strip the wax off and check things out. We shall see................


A couple of weeks ago I was out at Bolsa with a friend. Well, we both got on a wave, and he fell. His board shot over at me, and hit the Waterlog. I got a small scratch. The foam Hobie didn't fair nearly as well.................... Fortunately he has second board and was able to enjoy today!!!!

The other good news is he recieved the longboard skateboard I built for him today!!! Jeff was VERY stoked about it. Should have gotten a picture of him rideing it. I think he will enjoy it, if he can keep the kids of of it!

Read full post >>

Another Longboard

Wednesday, July 16, 2008 0 comments

The latest project is a longboard skateboard. Another item I saw in a store and thought, "I can build one of these for less than that, and it would look a lot cooler." I ended up buying one anyway, but headed off to the wood store.......................


I already had a bunch of maple, so all I needed was some mahogany. A few rips on the tablesaw, and a bit of glue to put it back together. for some trim on the nose and tailblocks I added a strip of ebony.


For the finished shape I thought a nice longboard surfboard shape would look cool, and since I recently finished the waterlog, I used it as inspiration for the shape. I was a little sloppy on the glue-up of the plank, but a trip to my friend Justin at Arroyo Hardwoods, in Pasadena, to run it through the thickness sander had that taken care of. The finished thickness however was a little thinner than I would have planned, but I like the flex of it.


Not knowing much about skateboards, I went into the local surf/skate shop and asked for some longboard trucks. This guy, Alex, was happy to help. He pointed me to a set of Gullwing Chargers, with some Sector Nine bearings, and Sector Nine wheels (72mm).
The board finished out at 57"x10 1/4". It has a great flex, and carves excellent!
I am giving this board to a good friend of mine, Jeff. A couple of years ago he helped me start surfing, loaning me a board and getting me in the water.

Read full post >>

In The Water!!!!

Saturday, May 10, 2008 1 comments

My friend Trevor makes a weekly trip down to Bolsa Chica and was happy to have me come along. We met at his house and loaded the boards at 5:30. The 40 min drive to the beach was great, drinking coffee and chatting about the great day this was to be. Also a bit of talk about the early arrival of stingrays in the area, and of course the recent shark attacks. But we figured the odds were in our favor and we were going to have some fun!! When we pulled in the parking lot at few of Trevors usual Harbour buddies were already there. Everyone was interested in the board, and thought it looked great (thanks to all for the compliments). Then someone mentioned the dead sealion on the beach. Figured our odds got better, as now if there was a shark he would be full........


I waxed the board last night. It was difficult covering up the wood, I guess the show side is now the bottom!!!


It was a grey day, and the surf was small and choppy. Not ideal, but a GREAT day. I was able to stand up on a few waves, and Trevor gave it a go catching two nice rides.


Sorry, no pictures of me standing, but I did get a couple of good rides!!!
I am extreamly happy with this board, and counting the days to get back out.

Read full post >>

Finished!!!!!

Monday, April 28, 2008 0 comments

I spent most of last week polishing the board. After the gloss coat of epoxy was applied and cured, I sanded from 220 through 2000, followed by medium and fine polishing compounds. Then Mcguire's Showcar glaze and finally carnuba wax.
I am hoping to get out and ride it later this week..........

Read full post >>