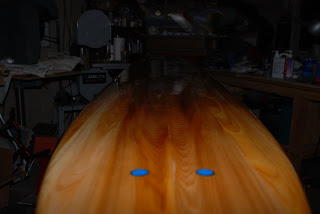
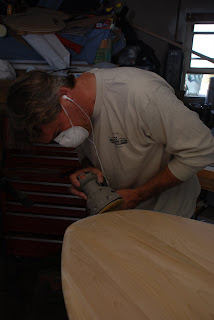
Finished!!!!!

Monday, April 28, 2008 0 comments

I spent most of last week polishing the board. After the gloss coat of epoxy was applied and cured, I sanded from 220 through 2000, followed by medium and fine polishing compounds. Then Mcguire's Showcar glaze and finally carnuba wax.
I am hoping to get out and ride it later this week..........

Read full post >>

Leash and Vent Plugs

Saturday, April 26, 2008 0 comments

I located the vent and leash plugs about 10 inches from the tail. The vent plug is designed to sit proud of the surface, I chose to counter sink it into the top deck. I drilled the holes for each plug (fortunately hit the blocking!!!!)
The tape is to ease cleanup of any dripped or sqeeze out of the epoxy.
After the epoxy set, the gloss coat was applied to both the top and bottom surfaces of the board. You can see the tape covering the plugs, I also had tape covering the finbox slot on the bottom.

All that is left is the final sanding and polishing!!!!!!!!!!

Read full post >>

The Finbox

Sunday, April 20, 2008 0 comments

The Grain kit comes with a Fins Unlimited finbox, and very little instructions for it's installation. Pretty much all they say is, "cut a hole for the finbox, use a router or mallet and chisel. Trial fit it a few times and epoxy it in." What they fail to mention is the fin box has a part that has to be ground off after it is installed. Basically the 1 1/4" finbox goes in a 1" deep slot. There are some tabs that are there to sit on the surface of the board to align it correctly. There is also 1/4 inch of plastic that will sit proud of the board that keeps the epoxy from spilling into the fin slot. After the epoxy has set this is ground flush with the top of the board. Hopefully leaving a nice smooth surface. More on that when I get to it............

Here is how I went about cutting out the slot, and installing the finbox:

First I laid out where the box was to go (this had been thought out before the top planks went on since there had to be blocking on the inside of the board) and scored the fiberglass with a razor knife. I am about 5 3/4" from the tail of the board to the finbox, along the centerline.


I then peeled the fiberglass out and and put tape around to protect the surface. I used my Dremel with a router base to freehand the slot. The bit for the Dremel is only long enough to get about 5/8" deep, so I then set up my router with a pattern bit, using the top portion of the slot as the pattern for the bearing to ride on. A couple of passes later the slot was complete.
The router also left a nice clean slot. I think to do this again it would be worth making a template to cut the whole slot with the router.
You can see the small tab on the end of the box, and the 1/4" that sticks above the surface that will be ground off later.
I put more masking tape down to catch any drips and squeeze out of epoxy. The towel is to protect the other side of the board from the strapping planks I used to clamp with. The clamps are just pulled snug as not to distort the plastic fin box. The tape on the straps was to hold them together during the one man clamping show.

Read full post >>

Glassing the bottom

Saturday, April 19, 2008 0 comments

In preparation to lay up the fiberglass on the bottom surface, I first trimmed the
overhanging fiberglass with a razor knife.
Then carefully
used the sander to to remove what remained. Being careful to not take any wood away, leaving a smooth line around the rails.
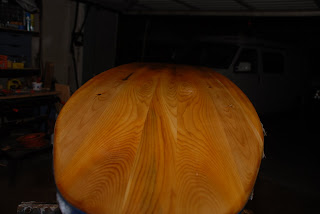
Here the first coat of resin is on. The wood is very absorbent, and the weave of the cloth is left visible and not completely filled.
I remembered to sign the board and put the dimensions along the centerline on the bottom. You can also see the weave of the fabric that is left exposed after the first coat of epoxy.


And a couple of shots after the second coat of epoxy is on.
Tomorrow I will trim the overhang and remove the tape. Then sand to fair in the seam. The next steps are to install the fin box, vent and leash

plugs.

Read full post >>

The Scary Part

Friday, April 18, 2008 0 comments

So the one part of this project that has had me a little scared is the fiberglass. My woodworking experience has kept me pretty confident that I could build the board, but this part is somethingI have never done.


Here is the board set up and ready to begin the process. I share the garage I am working in. I have had to annex most of it for the fiberglassing. Fortunately my landlord completed a project he had going and the space is available for the next few days.

The fiberglass is first laid out and trimmed to overhang about an inch.

To begin I mixed up some epoxy and dumped it down the length of the board. Using a scraper, this was then spread about, wetting and smoothing all of the fabric.
I wet the fabric all the way around the rails to the blue tape.
The tape makes a straight edge that will later be trimmed, providing a nice seam between the top and bottom fabric. Mid way through I had to mix up a second cup of epoxy. Somewhere I read that the cedar is very absorbent, that person was not wrong.


Here the first coat of epoxy is done. I will apply a second coat in about 4 hours to fill the weave of the fabric.

Read full post >>

Sanding.............

Sunday, April 13, 2008 0 comments

So I have been sanding the board in preparation for the fiberglass. I have had to fill a few gaps in the rails where I did not get the bead and cove clamped tight enough. The sanding is coming along well, and I think it is about ready. I am hoping to get started with the glass next weekend (April 19).


And a shot if me with the board......

Read full post >>

Side tracks, Shaping the Rails and putting on the Tailblock

Thursday, April 10, 2008 0 comments

A little side tracked over the last week. The Cub Scouts Pinewood Derby is coming up this weekend.

I started shaping the rails. I am not sure exactly what I am doing here, but I have been looking at a bunch of longboards so I will see how it turns out. Funny, I do not remember the bench every being that clean.........
I think the best purchase I have made for this project was te Lie Nielson spokeshave. I am sure I could have done with a less expensive one, but this thing does an outstanding job, taking beautiful thin shavings.
I made Jen give it a try. Now I can say it was a "family" project if she hassels me about it.

I have also glued on the tailblock, and shaped it to fair in smoothly. The tailblock is cedar offcuts from the planks, and ebonyscrap that I had laying around.

Now for lots of sanding............................

Read full post >>

Getting ready for the tailblock.

Tuesday, April 1, 2008 0 comments

After the glue had set for a couple of days, I unclamped the board and used a spokeshave to fair in the top plank to th ecurve of the rails. The spokeshave made quick work of it, and it was enjoyable to use.
The planks are longer than the frame, making the board longer than designed, so the tail had to be trimmed at the end of the frame. I drew a line square the centerline and used a Japanese hand saw to cut off the tail.
I added a small block in the end to give more surface area for the tailblock to glue to. When that glue sets the blocks will be trimmed flush with the end of the board.

To make the tail block, I used a couple of off cuts from the planks, and a piece of ebony that I had left over from making a fretboard for a guitar.

Read full post >>