Up to the Mountains

Friday, January 30, 2009 2 comments

Yesterday some friends and I took a little hike up Little Santa Anita Canyon out of Sierra Madre, CA. Our plan was to head up the Mt. Wilson Trail to Orchard Camp (3.3 miles).

Well, when we got to the trail head we saw the sign in the picture below.

In April 2008 there was a fire on the hills above Sierra Madre. I do not know how many acres burned, but it surrounded the mouth of the canyon. As the trail begins the hike takes you through the burn area.

About 1/2 mile up is the reason the trail is closed. The California Conservation Corps is doing some trail maintenance, and clearing out some of the mud slide area. They put dirt in the black shoot. It slides to th ebottom of the hill where another crew loads it into wheelbarrows and carts it to a dumptruck to be hauled away. We chatted with the supervisor (yellow hat) and continued on up the trail.


As we hiked up, we kept looking back at the view of the San Gabriel Valley and beyond. It was a nice clear day in Southern California.

Santa Anita Racetrack.

We did hike up far enough to get out of the burn area. This is the creek at First Water.
And the trail as we continued further up.

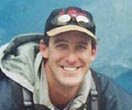
Due to time issues and having to get back, we only made it as far as the US Forest Service heli-pad. Dave S., Me, and Jeff C. in the nor tripod picture from the ground.

The panorama shot looks from the East around to the Southwest. We were still pretty low. We had not reached the CCC doing the trail manitenance yet.

We did not make it all the way to Orchard Camp. I think we did end up with about 5 miles round trip.


Read full post >>

Mmmmmmm Bacon

Saturday, January 24, 2009 0 comments

So last week I was able to go to the Gene Autry Western Museum with Reed's 2nd grade class. One of the tours the class participated in had to do with covered wagons and all the stuff the settlers brought across the country in them. For an activity, the guide gave each kid a piece of paper with a supply on it (flour, salt, corn meal, etc.). Then all of the kids gathered in a 4 foot by 10 foot area that represented the wagon. This was to demonstrate how crowded the wagons were for the settlers. I took a picture of one of Reed's friends, Mike holding his sign.

I e-mailed this picture to his father, Jason, who found it very funny considering how much Mike likes bacon. Jason replied, thanking me for the picture and included a link to a recipe called Bacon Explosion.


I was intrigued. Fortunately I was invited to a friends house to watch a UFC fight. The perfect opportunity to bring this bacon feast. Below is my version.


I used:

2 lbs of sweet Italian sausage

2 lbs thick cut bacon

about 1/2 lb mild cheddar cheese

Cattlemans BBQ sauce

McCormick Grill Mates Dry Pork Rub

The first pound of bacon is weaved into a 6 strip by 6 strip mat. In the bowl is the sausage after removing it from the casings.


The sausage pressed out to an even thickness and about the same dimension as the bacon mat. The dry rub is sprinkled on the bacon.


The second pound of bacon is fried up just like for breakfast, then cut into pieces and sprinkled on top of the sausage.


Then add cheese.................... At this point I also put some of the bbq sauce on. Then roll the sausage up into a loaf.......


And wrap in bacon!!!!!! and sprinkle a bit more of the dry rub on the outside.


On the grill I have already heated up the smoker chips and gotten the temperature to 225 F. The recipe says to cook it to an internal temperature of 165 F and suggests it should take about 1 hour for each inch of diameter.


Smokin'

Up to the 165 F internal temperature in 3 hours.

Since I was taking this to a friends house, when I got there I put a little BBQ sauce on top and put it in the oven for a few minutes.
Then slice and eat!!


The flavor was great (who would expect different, it is bacon!) The sausage was moist and full of flavor. Everyone enjoyed!


The unanounced theme of th eevening was UFC and Bacon. My friend Jim, who hosted the party, made what we refered to as bacon candy. Short strips of bacon covered in brown sugar and put in the broiler. MMMMMMMMMMM

Read full post >>

A Grand Day Out

Tuesday, January 20, 2009 0 comments

The harsh Southern California winters have been getting us down, so yesterday was a good day to go to the park.


A day in the park is not right with out some swinging.


Then I got out the longboard skateboard and gave some rides!!


Reed did some riding on his own.
...and some crashing!
A fun day was had by all.

Read full post >>

Another little project

Thursday, January 15, 2009 0 comments

I recently got a wood lathe. I think the last time I had used a lathe was when I was about 12. I have been enjoying playing around with it making a few pens. Well, as with most of my projects, Reed wanted to make a pen. I figured it would be a fun project for father and son.

The pen kits come in a bag full of parts, and you get to choose the type of wood or acrylic to use. Here Reed is getting the brass tubes out of the bag.
First the wood blank is cut in half, then holes are drilled lengthwise that the tubes will go in. The tubes hold the ink cartridge and twist mechanism in the pen.


The blanks are then put on a mandrel to hold it in the lathe.
Safety glasses on an gouge in hand, ready to begin turning the pen.


After the corners are taken off, we switch to a skew and speed up the RPM of the lathe. There are bushings of specific diameters that match the tip, middle band, and end of the pen. Using the skew the blank is turned to the desired shape.
After shaping is sanding and polishing. Starting with 150 grit sandpaper and working to 600, leaves a pretty smooth glossy surface. This is followed by a friction polish that leaves the surface with a glass look.
The tip and twist mechanism are pressure fit. We use a clamp to squeeze the parts together.
And then the finished pen.
Reed did a great job. He followed directions and listened as we talked about shop safety. He was very proud of it too. He wears it clipped to his collar, and showed it off to his teacher at church.

Read full post >>

Truss Rod and Neck Joint

Friday, January 2, 2009 0 comments

I have been getting a little bit done over the last week. I wa able to get the truss rod groove cut in the neck. The truss rod provides the stiffness of a metal rod to counter the tension of the strings. The rod that I use is a two way adjustable rod. By turning the nut, you can adjust the bow in the truss rod, and since it is secured in the neck, you are able to adjust the bow, or relief, in the neck.


Here the truss rod is set in the slot.
Using a Safe-T-Planer chucked up in the drill press I am able to put a taper to the neck. You can see a small shim at the headstock end of the neck. The taper is approximately 1/8 inch. The S-T-P will be used again later to get the headstock to proper thickness.


Next it is time to cut the dovetail joint that will connect the neck to the guitar body. I have a pretty cool set up to use a router to do this. The neck is attached to the jig so that the 4 1/2 degree neck angle will be cut in as well.


The same jig with a different template is used to cut the slot in the body for the neck to set into. The router bit is a 14 degree dovetail bit.


Here is the finished neck joint. I have also cut the knotch where the fingerboard extension will sit.


Read full post >>